Minikube is a tool that makes it easy to run Kubernetes locally, running a single-node Kubernetes cluster.
It is great for testing features, learning to work with Kubernetes, or getting frustrated trying to interpret an installation tutorial for a Kubernetes tool on your Minikube.
In this article, we will also look at Helm, which is a package manager for Kubernetes. Imagine an apt-get, npm, pip, etc… but for installing pre-configured resource packages.
Installing Minikube
To install on OSX:
You can use Homebrew, which is the easiest way: brew cask install minikube
Or install via the command line itself:
curl -Lo minikube https://storage.googleapis.com/minikube/releases/v0.30.0/minikube-darwin-amd64 && chmod +x minikube && sudo mv minikube /usr/local/bin/
To install on Linux:
curl -Lo minikube https://storage.googleapis.com/minikube/releases/v0.30.0/minikube-linux-amd64 && chmod +x minikube && sudo mv minikube /usr/local/bin/
Requirements
kubectl
macOS
Linux
VirtualBox or KVM
It is possible to run Minikube with the option
a —-vm-driver=none, running Kubernetes components directly on the host, instead of a VM. Docker will be required. If you use this option, configure a Bridge Network for docker. Otherwise, it might change between network restarts, causing loss of connectivity to the cluster.
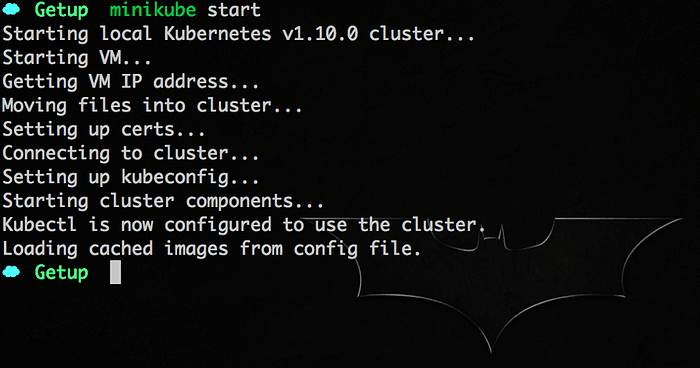
minikube start
Note: for some examples below, such as deploying an app, a better allocation of resources might be necessary for Minikube to support it. If you are having trouble, stop Minikube minikube stop and restart it with more memory: minikube start --memory=4096 --cpus=4
To be able to work with the docker daemon on your mac/linux, use the docker-env command:
minikube docker-env

Just run: eval $(minikube docker-env)
To access the Kubernetes dashboard: minikube dashboard
Installing Helm
OSX:
brew install kubernetes-helm
Linux:
curl https://raw.githubusercontent.com/kubernetes/helm/master/scripts/get > get_helm.sh
chmod 700 get_helm.sh
./get_helm.sh
To start helm, just type: helm init
If any problem occurs, try using it with these flags:
helm init --service-account default --client-only
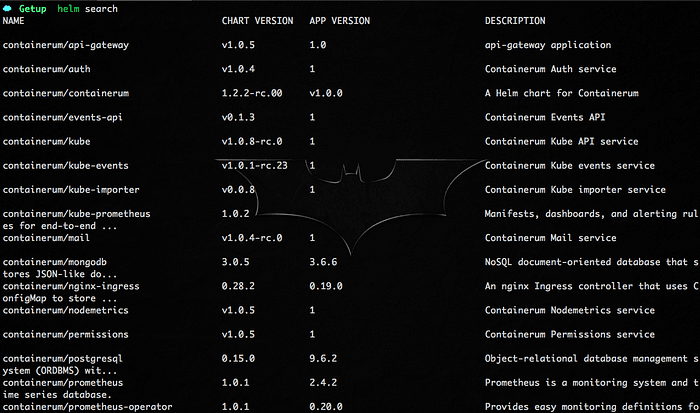
Now just look at the available packages with the command helm search
If this is the first time you are having contact with Kubernetes, your kubectl context will already be correct; otherwise (if you have already used kubectl before on another cluster), run the following command to switch the context to minikube:
kubectl config use-context minikube

Accessing the VM
Just typeminikube ssh
If you want more details on what is happening when typing this command, just exit and run the command again with the following flag:
minikube ssh -v 7
Enabling Ingress
Ingress is a set of rules that allows external connections to reach the services within the Kubernetes cluster, since typically, the Kubernetes cluster is protected by an Internet firewall. Kubernetes design resources like services, pods, etc., have IPs only routable inside the cluster network and are not directly accessible outside the cluster.
Just run minikube addons enable ingress and voilà, everything is working. If you want to see all running addons: minikube addons list

Viewing namespaces
It is possible to view them in the Kubernetes panel by typing minikube dashboard and clicking on Namespaces in the side menu
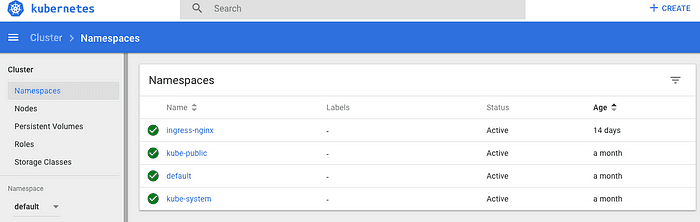
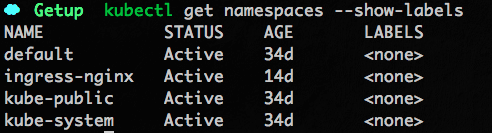
Via command line, namespaces are available through the commandkubectl get namespaces --show-labels:
Creating development, QA, and production namespaces
{
"kind": "Namespace",
"apiVersion": "v1",
"metadata": {
"name": "dev",
"labels": {
"name": "dev"
}
}
}
Just save the file and run kubectl create -f namespace-dev.json and you will have your development cluster.
{
"kind": "Namespace",
"apiVersion": "v1",
"metadata": {
"name": "qa",
"labels": {
"name": "qa"
}
}
}
For QA: kubectl create -f namespace-qa.json
{
"kind": "Namespace",
"apiVersion": "v1",
"metadata": {
"name": "prod",
"labels": {
"name": "prod"
}
}
}
And finally, in production: kubectl create -f namespace-prod.json
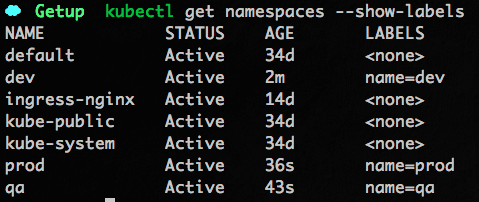
If you run the namespace listing command again, you will see that they are now created: kubectl get namespaces --show-labels
Deploying an application in the cluster
Let's deploy a URL shortener directly in minikube. The source code can be checked here.
First, we are going to create a deployment for the database (Postgres), with the file below:
apiVersion: apps/v1beta1
kind: Deployment
metadata:
name: postgres
spec:
template:
metadata:
labels:
app: postgres
spec:
containers:
- name: postgres
image: postgres:9.6.5
ports:
- containerPort: 5432
env:
- name: POSTGRES_DB
value: url_shortener_db
- name: POSTGRES_USER
value: user
- name: POSTGRES_PASSWORD
value: mysecretpassword
kubectl create -f deployment-postgres-minikube.yaml

To verify if it was created correctly, just type:
kubectl get pods --selector=app=postgres

To see check if the pod is running, just execute:
kubectl exec -it postgres-74bdd6978d-k8f9p bash
Once inside your pod, you can run the command to verify if Postgres is working correctly:
psql -U user -d url_shortener_db

Attention: it may be necessary to run su — postgres first if you are logged in as root, because postgresql does not allow access as root user.
Now let's expose the pod through a service:
apiVersion: v1
kind: Service
metadata:
name: postgres
spec:
ports:
- port: 5432
selector:
app: postgres
kubectl create -f service-postgres-minikube.yaml

To check that the service is up:
kubectl get services
Now that we have the database, it is time to deploy the application:
apiVersion: apps/v1beta1
kind: Deployment
metadata:
name: webapp
spec:
template:
metadata:
labels:
app: webapp
spec:
containers:
- image: xcoulon/go-url-shortener:0.1.0
name: go-url-shortener
env:
- name: POSTGRES_HOST
value: postgres
- name: POSTGRES_PORT
value: 5432
- name: POSTGRES_DATABASE
value: url_shortener_db
- name: POSTGRES_USER
value: user
- name: POSTGRES_PASSWORD
value: mysecretpassword
ports:
- containerPort: 8080
kubectl create -f deployment-webapp-minikube.yaml

To verify the running webapp pod, execute the following command
kubectl get all -l app=webapp
With this, we can see that the pod status is Running :)
Now let's take a look at the logs:
kubectl logs po/webapp-78c4f886f5-wtrl9
You can find a more detailed explanation here (in English).
Minikube is a very cool project, if you are willing to have a bit of patience, since it will not always be fast!
FINAL MESSAGE! Having a Kubernetes cluster to learn, explore tools, or even try to develop Controllers is expensive, so Minikube becomes a great alternative by providing a zero-cost exploration environment.
Author: Guilherme Esteves
Newsletter Getup.
Atualizações sobre Kubernetes e Software Supply Chain Security todos os meses.
Operating Kubernetes in production for more than 13 years. With Quor, this experience extends to software supply chain security as well.
GET UP
© Getup · 2026